Tuesday, December 22, 2009

The easiest, yummiest dessert ever!!

I have had several Christmas parties this year that I needed to bring a potluck dish to.  Be ready to be shocked - I am allergic to chocolate.  That's right - no chocolate for me.  Because of that I ALWAYS volunteer to take a dessert.  That way I know there will be something I can eat there.  So I just whipped up this super easy, super yummy dessert and decided to share it with you guys.

PEANUT BUTTER RICE KRISPY TREATS
1/2 cup honey
1/2 cup sugar
1 cup peanut butter
2 cups rice krispies


Melt honey and sugar together in a saucepan on low. 


Cook until just before it starts to boil.  Then take it off the heat.


 Quickly add the peanut butter and stir it in until it melts.


Add the rice krispies and quickly stir them in as well.


Spread out wax paper on your counter and dip the cookies onto wax paper.


Congratulations!!  You are all done.  Now wasn't that easy!  Now eat and enjoy!


Monday, December 21, 2009

All Aboard the Gingerbread Train

I am a little behind on my posts due to the whole no electricity thing.  So I hope to give you guys several posts to read over the next few days.

Last weekend, our good friends came over with their two kids and we made gingerbread trains (and houses) together, then went to go see Christmas lights at the racetrack.  Our kids had a great time making a mess, but I think it would have been smarter to put the train together before calling the kids over to decorate it :).  We'll have to remember that for next year.

The Process:


The Final Product:


As you can see, we made some wonderfully fun gingerbread creations and (mostly) had fun doing it.

Going to watch the Christmas lights was another story.  The racetrack near us puts up miles of Christmas lights every year.  We got to the racetrack at 6:15 - it opened at 6.  So we were there only 15 minutes after it opened, yet we had to wait an hour and a half to get to the lights.  And the way they do it, you are stuck in this line of cars and can't even chose to leave if you wanted to.  We had all 8 of us piled into one minivan, so there were kids bouncing all over the van (we were going about 1 mile an hour, so we had let them out of their seats).  Getting. very. hyper!  Once again, things I would change next year - I would bring a DVD player for the waiting time!!!!  By the time we got to the lights, we moms, had almost had enough!  But watching the kids watch the lights was worth it (as was driving on an official NASCAR racetrack, even if it was in a minivan).  At the end of the whole deal, we had been in the car for 2 hours and 15 minutes.  Everyone was tired, thirsty and a little cranky.  Thankfully our kids fell asleep very quickly on the drive home.

In all, it was a very fun afternoon/evening - something we'd love to do again next year.


Sunday, December 20, 2009

Christmas Decorations from my house to yours

Well, my original plan was to get this post up on Friday night before all the McLinky parties ended, but guess what...it snowed.

Now for some of you out in blog land that's no big deal, but down here in 'ole Tennessee, that's a big deal.  It snowed about 6 inches - more snow than we've had in 13 years.

Once again, I know you are asking, what does that have to do with me writing a new post?  Well, with all that snow, we lost power at 6:30 Friday night...and we still don't have power as of noon on Sunday!  Luckily, I have great parents close-by with a nice warm house that we can stay at.  So, they have been hosting us for 2 days now.  My fingers are crossed that our power will come back on before Christmas.

Back to the original reason for the new post - our Christmas decorations.  Now, I've seen several of you out in blog land that claim to just decorate "a little" for Christmas, but really go all out (in my opinion).  It looks awesome!!  Don't get me wrong.  But I REALLY do just decorate a little.  I usually add a little more each year, so one day I'll get to the whole house.

OK, so I do have a wreath on the door, but the day I took these pictures, it was just way too cold outside to open the door.  You'll just have to imagine a cute little wreath with bells on it :).

Come on in the front door.  This is what greets you.


Close-up of my bows.  Come on up the stairs and see our tree.  Last year I bought a stocking tree since we don't have a mantel.  (David wanted to pose by his stocking.)


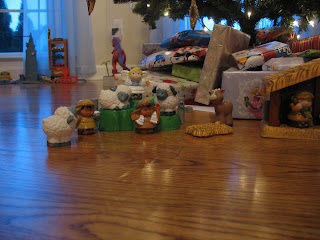
And, to remind our kids what the real meaning of Christmas is, we have this under our tree.  They love to play with it all the time.


On the windows next to the tree I made a wreath.  I have plans to make another one for the other side, but it's not done yet.  And unless I get power soon, it may not get done before Christmas.


Next turn around and look at my display on the piano (once again, because we don't have a mantle).

Our piano is 112 years old and I love it!  It has candlestick holders because it was made before electricity was around.  So those get decorated as well.  Did I say that I really love my piano?  Because I do.


Follow me in to see our cards, displayed, oh so creatively by taping them onto the doorway.


Remember my advent calendar?  Here it is in the hallway.


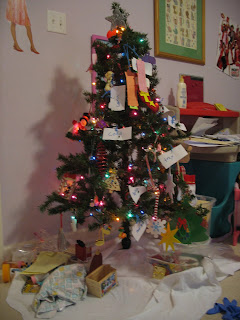
After this, the only thing left is the kid's rooms.  I found little 4' trees at Hobby Lobby 2 years ago for $2.50 (yes, that's right - less than $3!)!  So I bought one for each of the kid's rooms.  They are allowed to decorate it any way they want. 

First is Julie's room.


And now, David's tree.


Thanks for coming to visit my home.  I hope you and your family have a wonderful Christmas!!


Tuesday, December 15, 2009

The Guest Blogger Returns

I realized that I haven't posted a new hairdo for a while, so I'm bringing these 2 out of my archives.  Remember my guest blogger?  Well, she's back - sort of.

These 2 hairstyles were designed by Julie but were not done on my hair like before.  Instead she told me how she wanted me to do her hair and I did it.  Here's the first one:

Big Knot:

1) I was instructed to make 3 ponytails on the top of her head, but the last time looping around not to pull the hair all the way through.  That made 3 loops in her hair.


2) Then take the rest of the hair and put it in a high ponytail.

 
3)  Take the ponytail and thread it through all three loops in a circle.  Secure with a bobby pin.  (See picture below too.)


The loops pulled tight.

 
4)  Tuck the ends of the original 3 loops under and secure them with bobby pins as well.

The final look:


Braided Flip:


1)  Part the hair in the middle, then part down to the ears.  You'll have 2 sections on top.  Pull those up temporarily.

 
2)  Put the rest of the hair in a semi-loose ponytail.  Stick your finger up through the ponytail in the middle of the hair.

 
3)  Flip the ponytail through itself (using your finger as a guide).

 
4)  French braid each of the top sections and secure with a rubber band.

 
5)  Tuck the braids down in the ponytail.

The final look:


These were both thought up and designed by Julie.  Be sure to tell her what good ideas she had.

P.S. The second style held up much better than the first.  The first fell out before the end of the day.

Update: I'm participating in:
giveaways